
Day 3 - Under the Hood of your Google Analytics: The Basics

Even though GA is free and is relatively easy to set up, making full use of the tool and making it a powerful force for your business requires some steps to customization. If you use Google Analytics just as it comes, you are only getting a part of value.
I’m going to be going through the basics of the basics, specifically what you should be doing once you implemented Google Analytics on your site.
The settings we are going to be reviewing are the following:
Referral Exclusion List
IP Exclusion
Demographics and Interest Reports
Now before you start freaking out that this might be too much, do the following: grab a tea or coffee, do a couple shoulder rolls, and take a deep breath. The world will not crumble if make a mistake or don't get one of these. And if it does, you can always comment below for me to help you troubleshoot.

For each of these, I will first explain the setting and then show you where and how to change it. All of these options will be located in the Admin area of Google Analytics, under Property.
Setting these up is simple (I promise I’m not a rocket scientist) and shouldn’t take you more than 30 minutes MAX! Don’t believe me? Go ahead and follow along with your Google Analytics’ account open in a separate window.
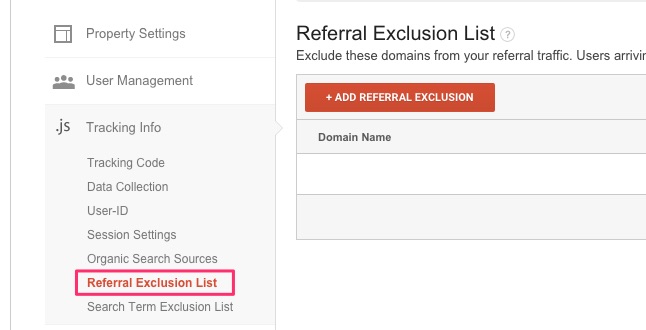
Referral Exclusion List
This setting might seem strange but please stick with me and consider if this applies to your site. Google Analytics automatically considered the domain declared in Property Settings (Admin > Property > Property Settings) but that is the only one is watches out for when it separates out external vs. internal traffic. If you have other domains that might be considered internal (like ones you might have bought and have redirects set up), then you must declare them here.
To change the Referral Exclusion List, go to Admin > Property > Referral Exclusion List.
This could also apply if you have a shopping cart or some other transaction action that requires users to leave your site and then come back, make sure to also add to this list.
IP Exclusion
This takes two seconds to set up and can really impact the data you are capturing in your account.
First, let's find out what your IP is. Go to your browser and search "My IP". You should get something like this:

Copy the whole line of numbers and paste it somewhere safe to use in a bit.
Now go to Admin > View > Filters. If you have several views, you might want to do this for each one, depending on what the purpose of each one is.

Now select the red "Add Filter" button and fill in the following information:
Filter Name: Exclude my IP
Filter Type: Predefined
Exclude : traffic from the IP addresses : that are equal to
Paste your saved IP address

Click "Save" and your set.
Not so bad, right? Yay! Okay, final one!
Demographics and Interest Reports
Although this is the easiest configuration to turn on, I want to highlight the importance of the fine print here; how Google captures this data and how it affect you and your data is something you should read on your own time (there is a “Learn More” link to get more information). I will be writing my opinions on this in a future post. For now, let’s turn it on!
To enable Demographics and Interest Reports, go to Admin > Property > Property Settings.
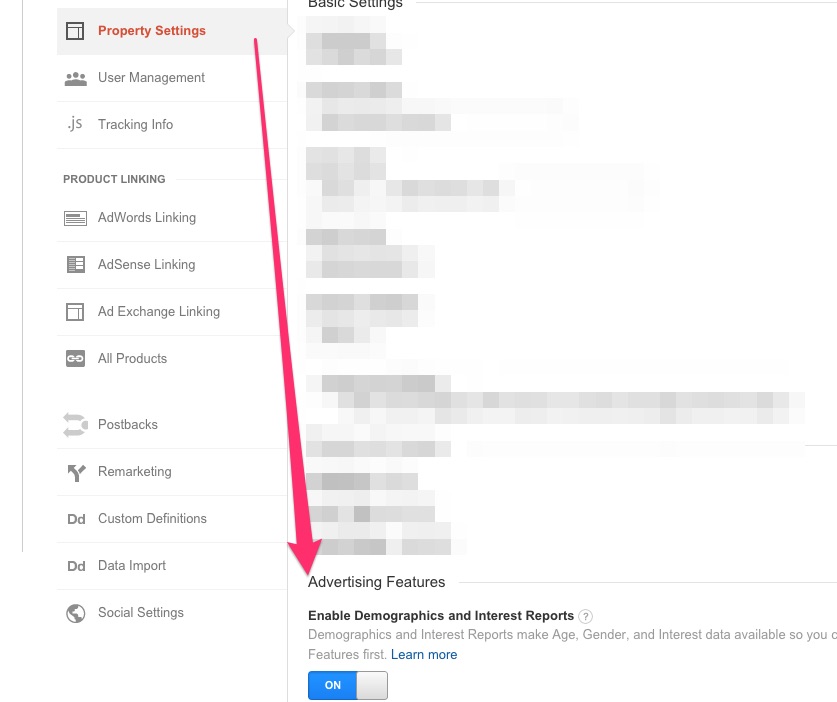
Enabling this gives you a lot of useful information about your visitors and who they are. The reporting that gets affected by this configuration is under Audience > Demographics and Interests.
Whew! Great work! I know that was a lot of information and I tried to keep this as concise as possible. It is soooo important to have your Google Analytics set up correctly, to collect quality data, and extract the best insights. If you have any questions about the above info, please comment and I will get back to you.
Ready for Day 4 next: get your web analytics lingo around metrics? Let's go!